Pay as you wish via PayPal or credit card.
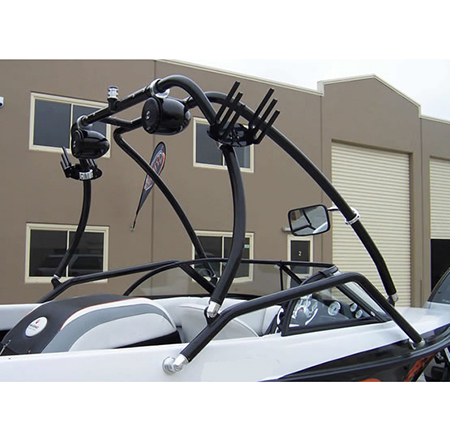
Origin Wakeboard Towers > Installation Guide > Origin Catapult Wakeboard Tower Installation Guide
This installation guide is only a guideline. Drilling tool is needed fopr installation. All hardware is to be hand tightened. Do not use air tools or electric drills to tighten hardware. Inspect if any parts are damaged or missing before installation.
1. Please remove the rubber caps of each leg, it is packaging material which MUST NOT be used for installation, or it will lower the tower strength.
2. Please DO NOT remove the plastic sleeves inserted in the H top section, they can prevent scratching when you insert tower arms into the top section.
Inspect the package for missing or damaged parts caused by shipping.

Cover the area where the base mounts will be placed with masking tape. This should be done in all areas where the tower will be mounted and the near surrounding area. This will help eliminate scratches to your boat while adjusting and measuring your tower attachment points.

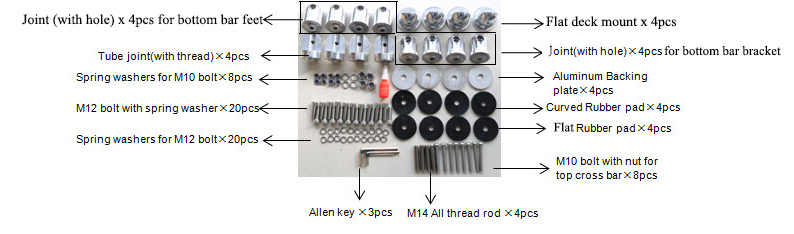
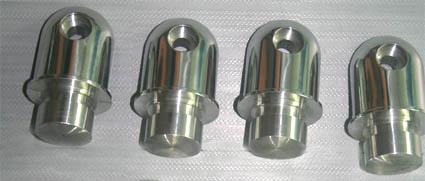
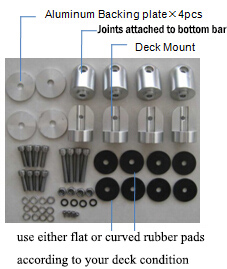
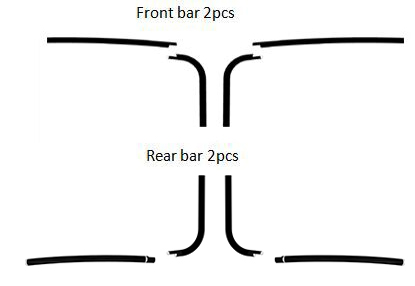
Attache the joints onto bottom bar, each bottom bar need 4pcs of joints as shown in below picture. Then use the bottom bar to determine the exact mounting position on the boat. Bear in mind the height in the boat, the windscreen window, additional tower accessories, wiring etc… When you have determined the correct position mark the position on the masking tape using the mounting brackets.
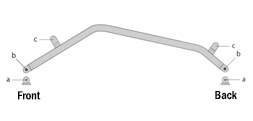
After marking one side you can mark the other side using the mounting brackets. Make sure to mark the deck mounts on the direct opposite of the boat using fixed points of reference on the boat.
Do not measure from windscreen, cleats, vents or use as reference point.These objects are not always square and the same as the opposite side. It is best to use the front or rear of the boatas the reference point or the top edge of the deck mould.
SIDE MOUNT is allowed but make sure the left and right symmertrical completely no matter they are side mounted or ontop. This is very important to ensure you install this tower correctly and fold it easily in future.
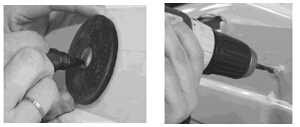
Keep in mind you are going to be placing backing plates and need access to fit a wrench to tighten the nut on the deck mount bolts on the inside of your boat. Before drilling inspect the inside of these locations for obstructions such as wires or cables. You are now ready to drill the holes. When drilling in fiberglass first use a pilot bit size 6 than a drill bit size 14. After drilling the 4 holes, it is recommended to countersink the holes using the countersink bit, this prevents the gelcoat from cracking.
Take out the 4x deck mounts, backing plates and rubber pads from the mounting set and install the base deck mounts. All feet are swivel and can work with various mounting angles. Be sure to mount the bottom bar vertical. When you fail to mount the bottom bar vertically, you will not be able to fold the tower. Snug the bolt but do not fully tighten at this point. Remove the Bottom bars and Tighten the 4 Mounting Brackets. Reinstall the bottom bar on the Mounting Brackets and tighten the bolts.
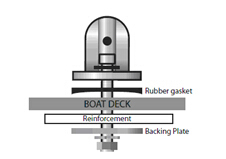
IMPORTANT: When the BOAT DECK is less than 1cm thick we strongly advise to reinforce the mounting bracket with wood or fiberglass cloth which is at least 1cm thick.
The reinforcement should be as big as possible. This prevents stress on the boat which causes the gelcoat to crack. WARRANTY DOES NOT COVER: Any cracks or other damage to the gelcoat or boat because of mounting the tower. Snug the bolt but do not fully tighten at this point.
Step 6
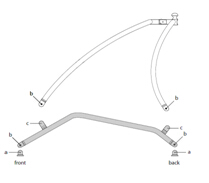
Use M12X35 bolts connect the 4 front bars to 1 left and 1 right arm. Snug the bolt but do not fully tighten at this point.
Step 7
Slide the taped bar into the Top Cross bar. Beware for scratches. Keep in mind that the tow point need to be facing towards the back of the boat. Slide the second front bar into the Top Cross bar and attach the front bar on the other mounting bracket. As one person holds the tower assembly you can now assemble the rear bars.
NOTE: When you have a narrow boat you probably need to shorten the Top Cross Bar to make the tower fit to your boat.
You are now ready to square up and center the loose assembly. Have someone stand in front of the boat and determine that the tow point is centered and the tower arms are symmetrical. Make necessary adjustments.
Drill through the predrilled holes in the center section from each side with size 10 drill bit and install bolts and cap nuts. One person will still be stabilizing the tower through this step. Tighten all hardware for completion of tower installation.
IMPORTANT NOTE FOR INSTALLATION
The construction of your boat, design of the deck, thickness of deck and walls and overall design may cause movement at the mounting points. If the construction of you boat causes movement at the mounting points or incorrect mounting location creates added pressure on joints increasing movement of the tower it voids warranty. If in doubt do not install the tower or seek a professional to install for you.
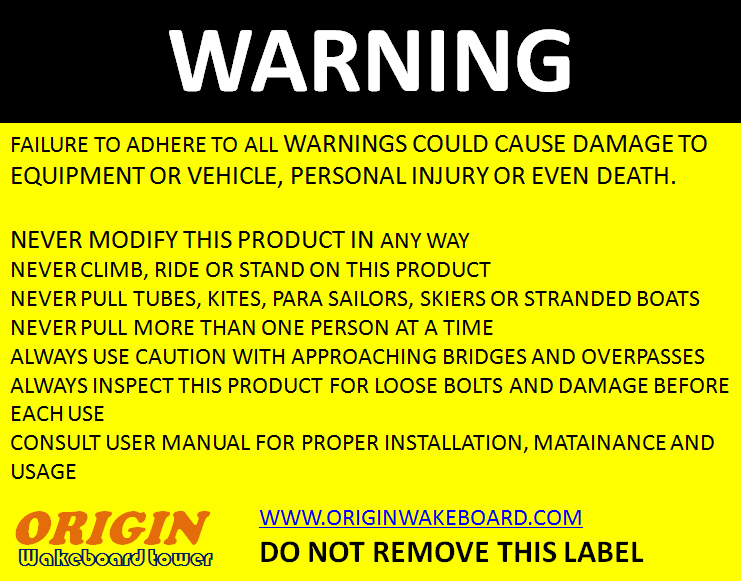
Always read the warning labeled on the tower prior to each use.